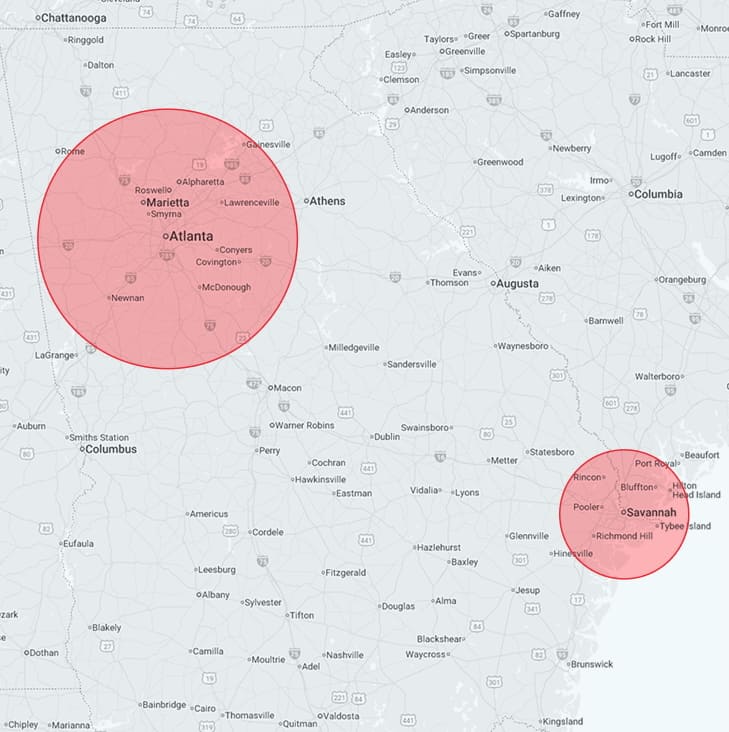
Serving Greater Atlanta & Savannah/Hilton Head
HVAC, Plumbing & Electrical Experts

Our Services
Air Conditioning
Heating
Plumbing
Electrical
Weatherization
Commercial

50+ Years Serving Property Owners in the Atlanta Metro Area
At R.S. Andrews, our HVAC technicians are committed to protecting your indoor comfort with top-notch heating, cooling, plumbing, and electrical solutions in Atlanta and the surrounding areas. From 24/7 emergency repair services to AC maintenance to heating installation, our experts have over 50 years of experience to keep your home or business running comfortably and reliably in the Atlanta Metro Area.
Since 1968, our fully insured team has provided a variety of professional services tailored to your residential and commercial needs.
A Few Reasons To Smile
Ready for Emergencies
Decades of Experience
Financing That Works For You
Satisfaction Guaranteed
Current Special Offers

Expires: Jan 31, 2026

Expires: Jan 31, 2026

Expires: Jan 31, 2026
The Smiley Advantage Plan
Save Money
- Up to 10% off service repairs
- Diagnostic reduced to $79
- Twice annual system maintenance with duct inspection included
- Each additional unit $9.99/month
- Special club member benefits for HVAC, plumbing, and electrical service
- Exclusive discounts on emergency services
Save Time
- VIP Service
- Priority Scheduling
- We take care of calling you – you don’t have to remember to call us to schedule your tune up!
- Special Services
- Free HVAC Replacement Consultation
Peace of Mind
- Keeps your family safe and comfortable all year round
- 100% Satisfaction Guaranteed
- Save Money on Your Utility Bills
- Keeps Your Systems in Peak Operating Condition
- Reduces Breakdowns
Reach Out To Us
For over five decades, R.S. Andrews has delivered trusted HVAC, plumbing, and electrical services to homes and businesses across the Atlanta Metro Area. Our fully insured team is available 24/7, bringing fast, professional solutions to restore comfort, safety, and convenience when it matters most.
We combine deep industry experience with up-front pricing, flexible financing, and a commitment to customer care that’s earned generations of local trust. Whether you need seasonal maintenance, a system upgrade, or urgent repairs, you’ll get dependable service backed by lasting results. Reach out today and experience the service Atlanta has counted on since 1968.
Awards & Our Affiliations

Proudly Serving Greater Atlanta & Savannah/Hilton Head
We are happy to serve the Greater Atlanta & Savannah/Hilton Head areas, including these communities: Acworth
 Alpharetta
 Austell
 Avondale Estates
 Brookhaven
 Buford
 Canton
 Chamblee
 Clarkston
 Conyers
 Cumming
 Dacula
Heater on the fritz? Frustrated with plumbing problems? R.S. Andrews is just a call away!


